Apple used to make a thing called a Time Capsule, which was pretty cool. A little WiFi enabled NAS that allowed Macs on a network to back up via Apple Time Machine and store incremental file changes. Super handy, and happened automatically without having to plug drives in to your Mac. That all came to an end in 2018 when Apple canned the product. Boo.
https://en.wikipedia.org/wiki/AirPort_Time_Capsule
Thankfully, there's not much to the device, and everything that it uses is open source. We can make our own!
I'm using a Raspberry Pi for mine. But any POSIX compliant operating system will do. Bang it in a Linux VM, put it on a FreeNAS type device, whatever.
The interesting parts you need are:
-
Netatalk - an open source implementation of AFP (Apple Filing Protocol), which lets a Mac+TimeMachine talk to your device natively over a network. Don't confuse this with Apple's new APFS on-disk file system, which is something totally different.
-
Avahi - this is an open source implementation of the mDNS "zero-configuration" protocol, which is the same thing as Bonjour. It's a way for service to announce themselves on a network. Please note that this is a terrible thing for large corporate networks, as it relies heavily on noisy broadcast traffic. However on a home or small office network, it's tolerable, and the trade off is things work "like magic" without manual configuration needed.
Here's what I did:
-
Buy a Raspberry Pi. I grabbed a Model 4B with 2GB RAM, as it was the cheapest I could find. 2GB is total overkill, as this configuration uses under 100MB for kernel+applications.
-
Buy 2x desktop USB3 hard drives (3.5" 4TB, external power each), plugged them in the USB3 ports of the RPi. I tested them by running (as root/sudo):
apt-get install -y pv
cat /dev/sda | pv >/dev/null
That just sends raw data from the disk to nowhere and measures the read speed. 200MB/s sustained for a USB3 spindle drive. Not amazing, but not crap either. Good enough for this requirement.
-
Install Raspbian (soon to be renamed to "Raspberry Pi OS"). You can install anything you like, and there's heaps of options here: https://www.raspberrypi.org/downloads/
-
If you're on a Raspberry Pi, run the "raspi-config". Set your hostname to something meaningful (I've called mine "timemachine"), set your timezone, connect to WiFi if you want (Ethernet cable is fine too, obviously much faster on the new RPi4 with real Gigabit), and update the software. You might need to reboot when done, depending on the updates installed.
-
Format the USB drives as a BtrFS RAID1 mirror. Be careful with the following instructions, as they can destroy disk contents. My drives show up as /dev/sda and /dev/sdb on my RPi (with the OS on the SD card device /dev/mmcblk0). Ensure you point to the correct disks and don't destroy your data if you're on some other system.
If you don't want BtrFS or have some other pre-configured storage, skip this bit and jump to the Netatalk install.
Running as root/sudo:
apt-get install -y btrfs-progs btrfs-compsize duperemove
wipefs -a /dev/sda
wipefs -a /dev/sdb
mkfs.btrfs -m RAID1 -d RAID1 /dev/sda /dev/sdb
This will give you a BtrFS device UUID. You can also use the "blkid" command to find it, for example:
blkid | grep -i btrfs
/dev/sda: UUID="f9fe9e24-32eb-4f4d-83af-14f9d8cde4f7" UUID_SUB="a0b6f50a-e596-45bf-8e87-e8164f80ef6f" TYPE="btrfs"
/dev/sdb: UUID="f9fe9e24-32eb-4f4d-83af-14f9d8cde4f7" UUID_SUB="f60f114e-db90-4db5-9693-71928491de57" TYPE="btrfs"
The "UUID" is the BtrFS RAID device. The "UUID_SUB" are the individual disks. We want the RAID device. So let's tell the system how to find them on boot. First, make the mount point:
mkdir /raidAnd then edit /etc/fstab to include (substituting in your own UUID, which will be different to mine):
UUID=f9fe9e24-32eb-4f4d-83af-14f9d8cde4f7 /raid btrfs compress-force=zstd 0 0On boot, that will mount up my BtrFS RAID1 set as /raid. Either reboot or run "mount -a" to mount the disks.
I want to create a subvolume just for time machine:
btrfs subvol create /raid/timemachine-
Install Netatalk and Avahi
apt-get install -y avahi-daemon netatalk -
Create a timemachine user:
useradd --home-dir /raid/timemachine timemachine
Create a password for that user with:
passwd timemachineAnd now change the permissions of our storage so that the timemachine user can write to it:
chown -Rc timemachine:timemachine /raid/timemachine
chmod a+rX /raid
chmod -Rc u+rwX,g+rwX,o-rwx /raid/timemachine- Edit the file /etc/netatalk/afp.conf . This will tell the Apple Filer Protocol about the storage location, and also lie to any systems on the network and tell them that this is a legitimate Time Capsule. :)
Obviously you'll need to change the "path" parameter to meet your needs.
[Global]
mimic model = TimeCapsule6,106
log level = info
log file = /var/log/afp.log
afp listen = 0.0.0.0

[timemachine]
path = /raid/timemachine
valid users = timemachine
time machine = yes
ea = sys
If you want to know what all those specific bits do, run "man afp.conf" and read the documentation. I won't copy/paste them here, but these are ones I've used in larger rollouts (100+ Mac users hitting my virtual time capsule) and it worked fine.
Now, enable and restart the relevant services:
systemctl enable avahi-daemon
systemctl restart avahi-daemon
systemctl enable netatalk
systemctl restart netatalk
All done. Let's head to our Mac.
Command Line / power-users, you can use the "tmutil" command to automate the following. I do this when I'm mass-configuring hundreds of Macs via Puppet/Ansible/etc. But this is the much easier GUI method for one-offs
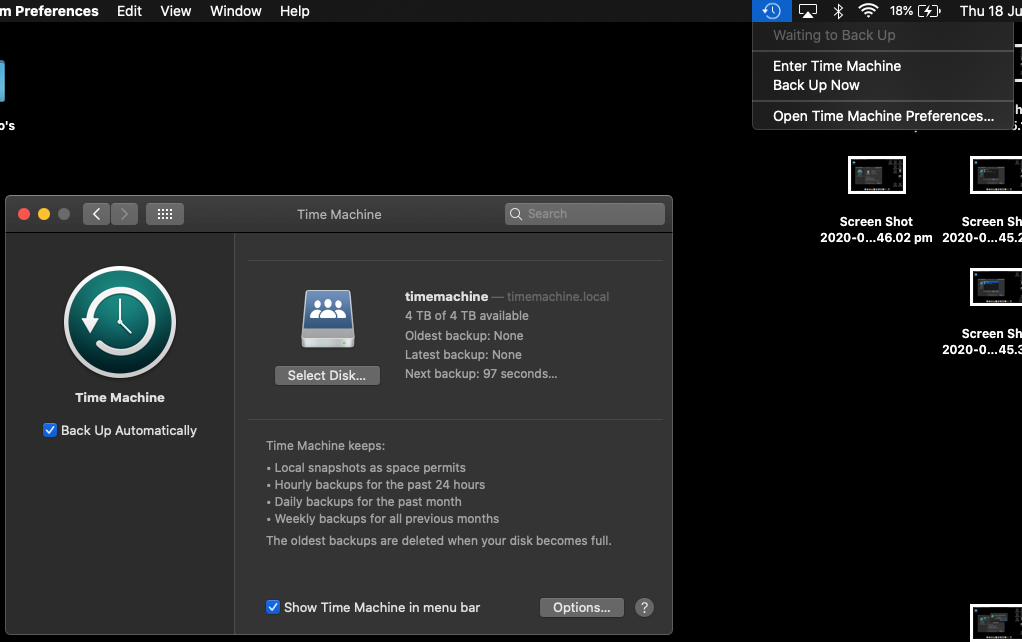
Find and open the Time Machine app. It'll look something like this:
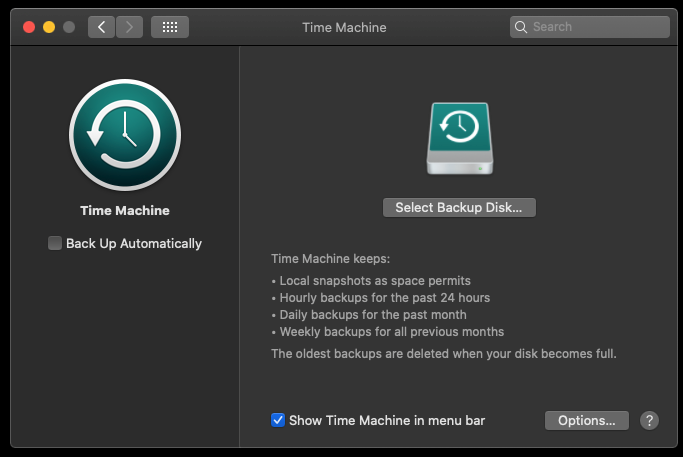
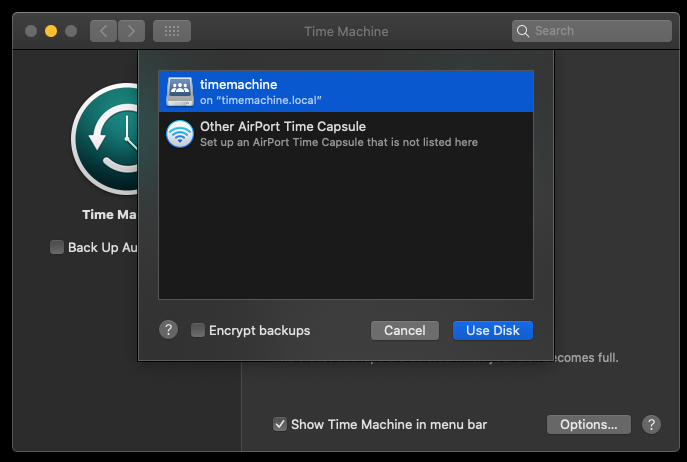
Click the "Select Backup Disk" button. You should see your network timemachine host (or whatever you named your system). Select it and hit "Use Disk".
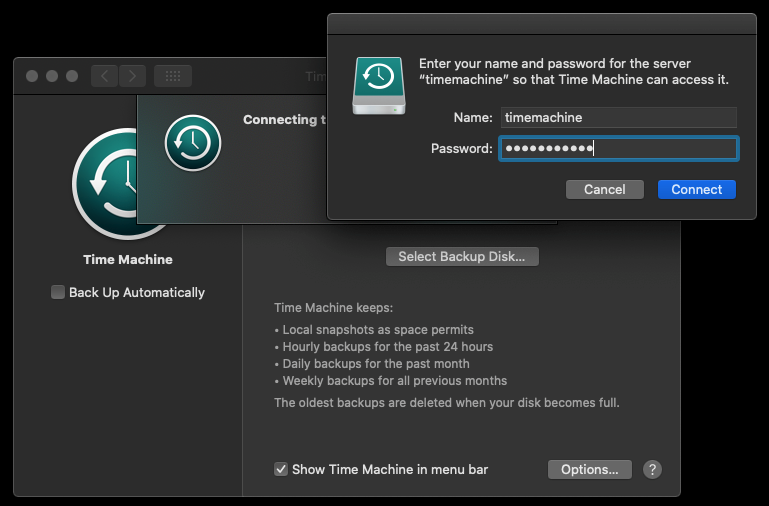
When prompted, put in the user credentials you created previously (see the "useradd" step).
And you're done! Ensure "Back up Automatically" is ticked, and let Time Machine do its thing.
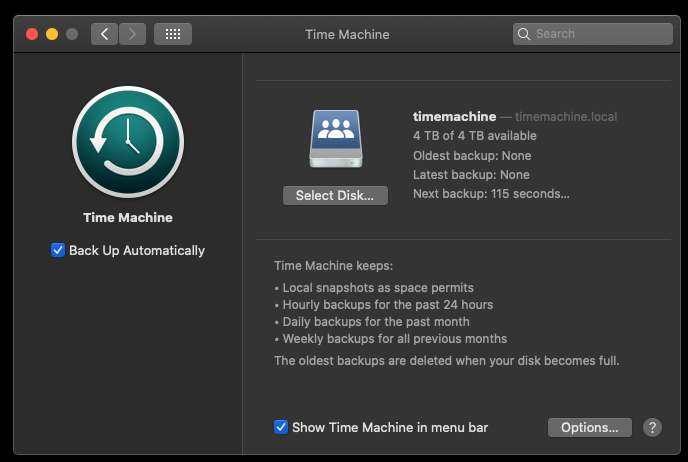
If you want to force the first backup (which can take a while depending on how much stuff you have on your hard disk), click the "Show Time Machine in menu bar" option. Head to the menu bar, hit the Time Machine icon, and click "Back Up Now".
Now all there is to do is sit and wait. Again, the first backup can take some time. However each time you return to the network, your Mac will find the timemachine host and opportunistically back up changes made since the last backup. Worth checking back every few weeks to make sure its working (just open Time Machine and check to see that previous versions are available).
Happy time travel!